If you are an engineer, I am sure you will definitely encounter a situation where you will need to work on multiple operating systems. One way to install more than one operating system is dual booting your computer, but this can be difficult for a beginner. The most recommended and easiest method is installing Oracle Virtual Box. Virtual Machines abstract the hardware of our personal computers such as CPU, disk drives, memory, NIC (Network Interface Card), etc, into many different execution environments as per our requirements, hence giving us a feeling that each execution environment is a single computer. For example, VirtualBox.
Downloading and Installing VirtualBox
To use Ubuntu along with Windows, one must have VirtualBox installed on their machine. For the installation of VirtualBox, follow the steps given below:
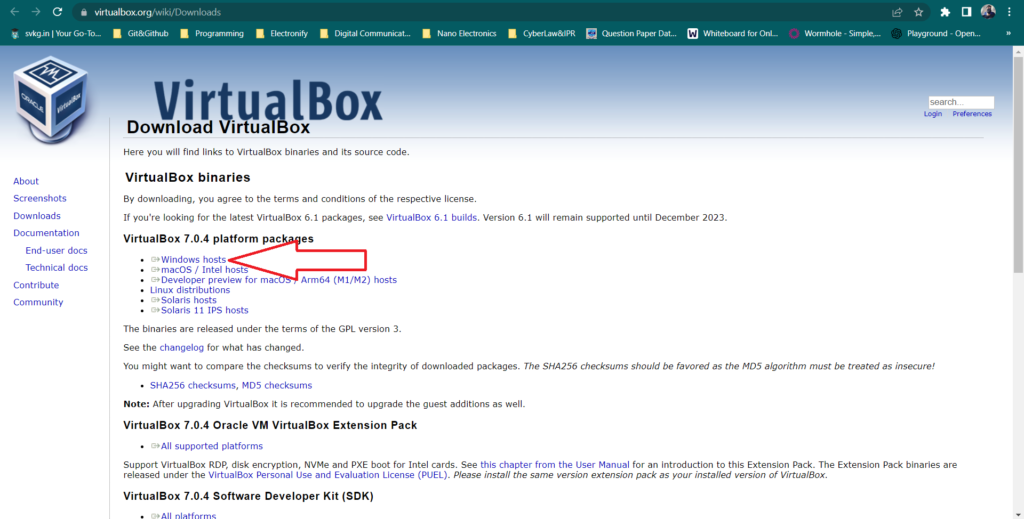
- First of all, you need to download the Virtual Box installer. Click here, and you will be redirected to the official download page of Virtual Box. Download the binary version for Windows hosts.
- Run the executable file as soon as the download completes.
- A custom setup dialog box will be displayed after starting the executable file, do Next–>Next–>Yes –>Yes –>Install –>Finish
After that, Virtual Box should be installed on your computer. Now, you can easily install the operating system of your choice by launching the Virtual Box.
Downloading and Installing Ubuntu
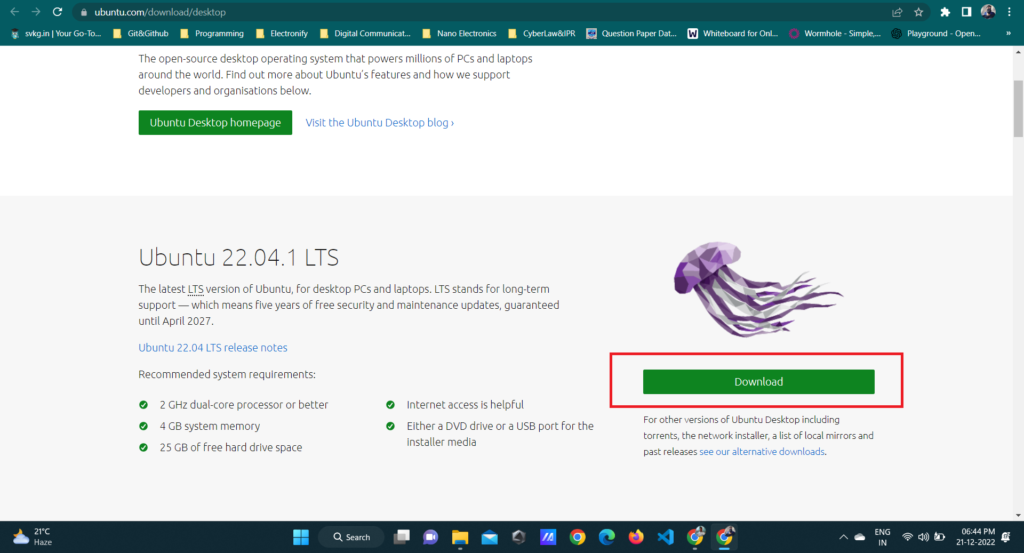
Before we begin with the installation process, we need to download the ISO file for Ubuntu. For that, all the versions of Ubuntu are available on the official site ubuntu.com
After the downloading is over, you can install Ubuntu on VirtualBox with the help of the following instructions:
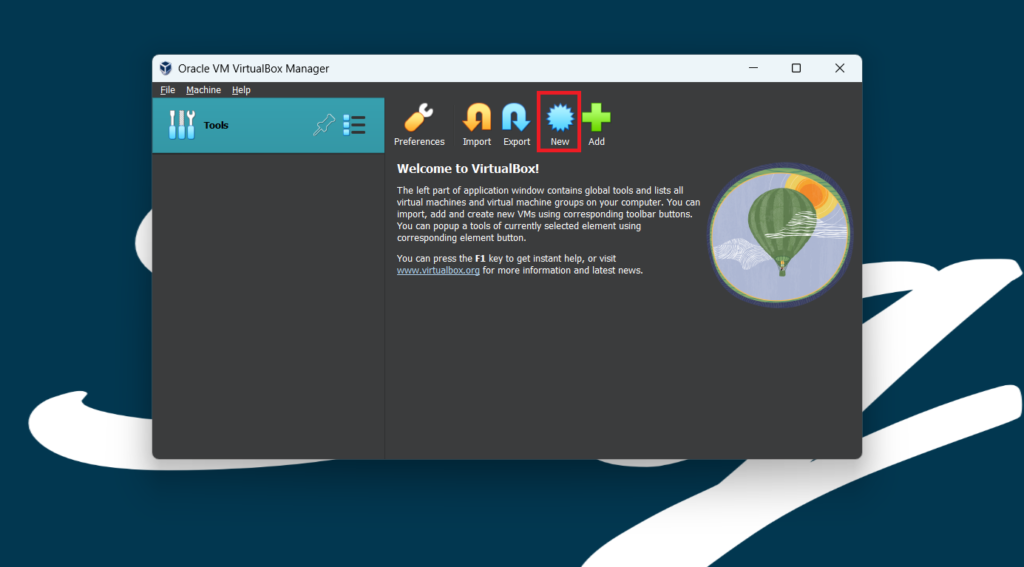
- Create a new virtual machine
Click New to create a new virtual machine. Fill in the appropriate details:
- Name: If you include the word Ubuntu in your name the Type and Version will auto-update.
- Machine Folder: This is where your virtual machines will be stored so you can resume working on them whenever you like.
- ISO Image: Here you need to add a link to the ISO you downloaded from the Ubuntu website.
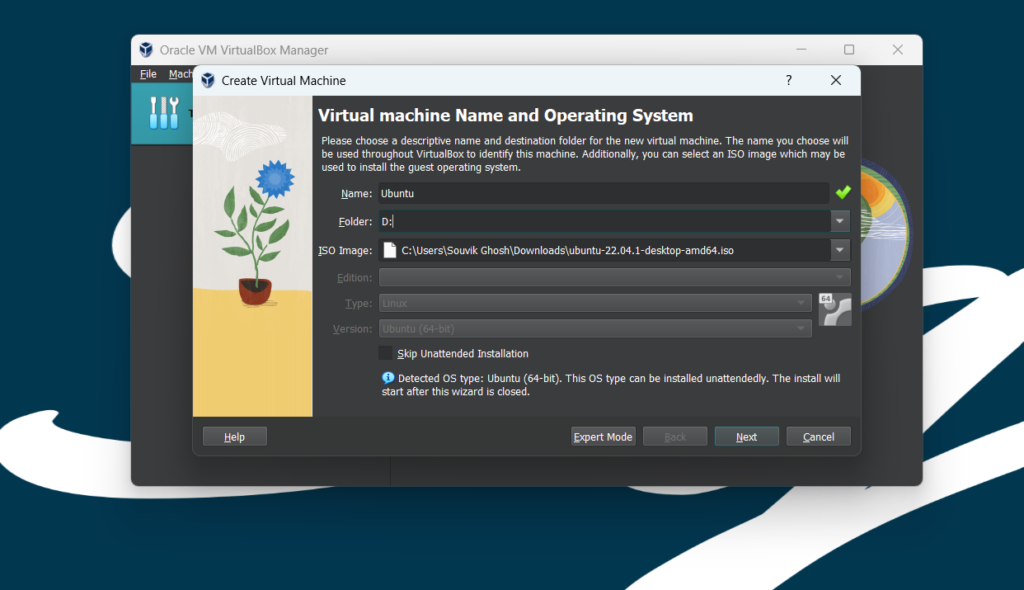
We want to install Ubuntu unattendedly so we can leave the checkbox to skip unchecked.
2. Create a user profile
To enable the automatic install we need to prepopulate our username and password here in addition to our machine name so that it can be configured automatically during the first boot.
The default credentials are:
- Username: vboxuser
- Password: changeme
Ensure your Hostname has no spaces to proceed!
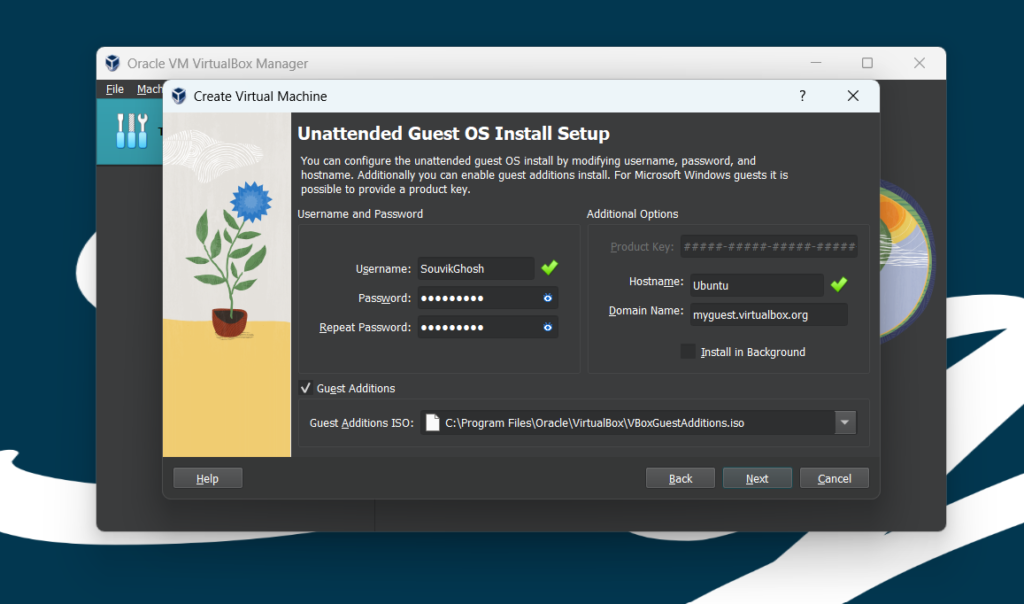
It is also recommended to check the Guest Additions box to install the default Guest Additions ISO that is downloaded as part of VirtualBox. Guest additions enable a number of quality-of-life features such as changing resolution and dynamic screen resizing so it is highly recommended!
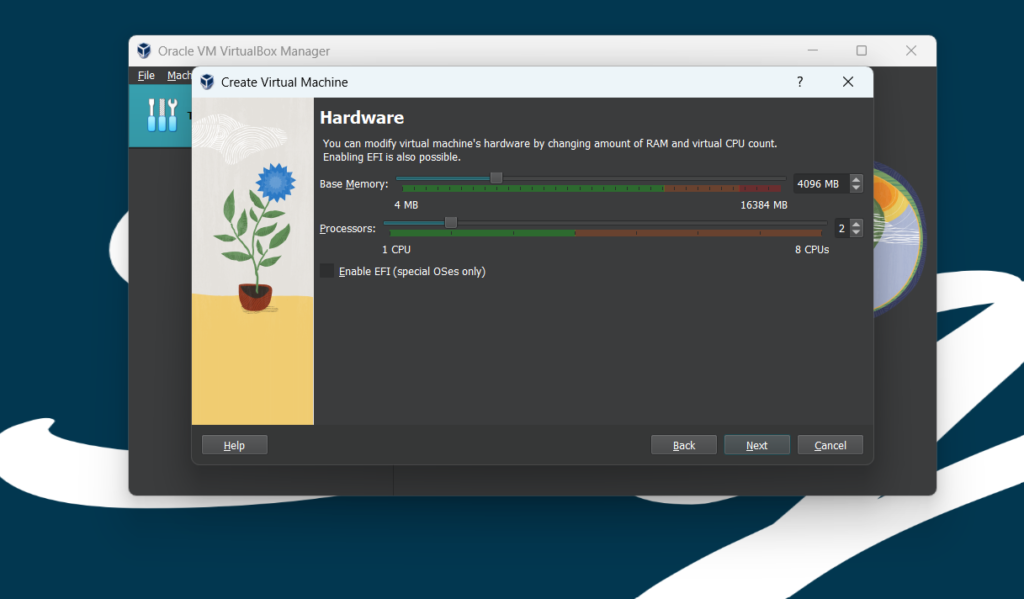
3. Define the Virtual Machine’s resources
In the next section, we can specify how much of our host machine’s memory and processors the virtual machine can use. For good performance, it’s recommended to provide your VM with around 8GB of RAM (although 4GB will still be usable) and 2 or 4 CPUs. Try to remain in the green areas of each slider to prevent issues with your machine running both the VM and the host OS.
Then we need to specify the size of the hard disc for the virtual machine. For Ubuntu, we recommend around 25 GB as a minimum. By default, the hard disk will scale dynamically as more memory is required up to the defined limit. If you want to pre-allocate the full amount, check the ‘Pre-allocate Full Size’ check box. This will improve performance but may take up unnecessary space.
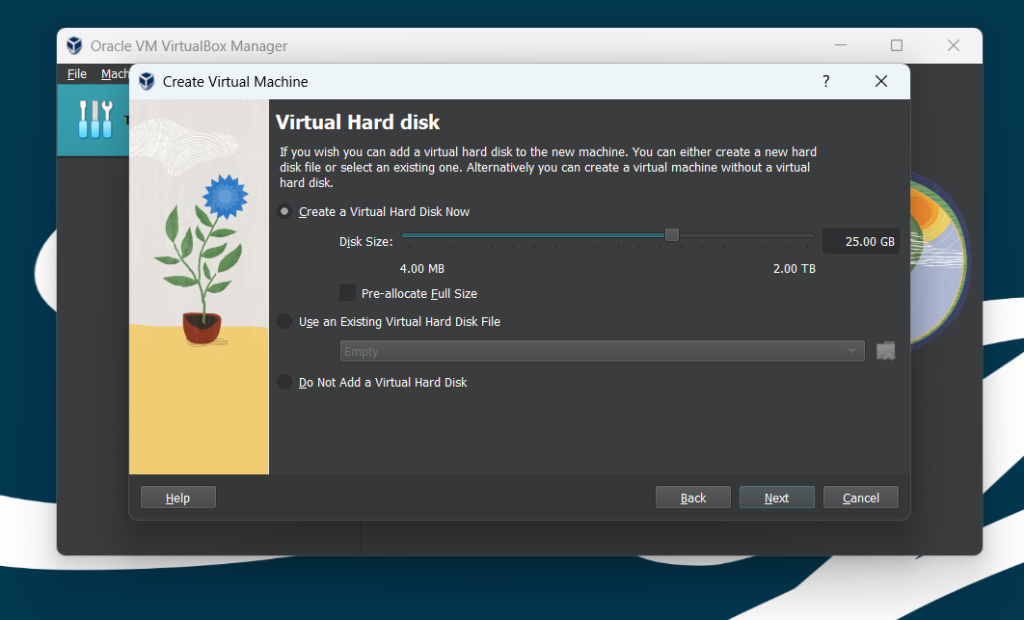
Click Next to continue and view a summary of your machine setting.
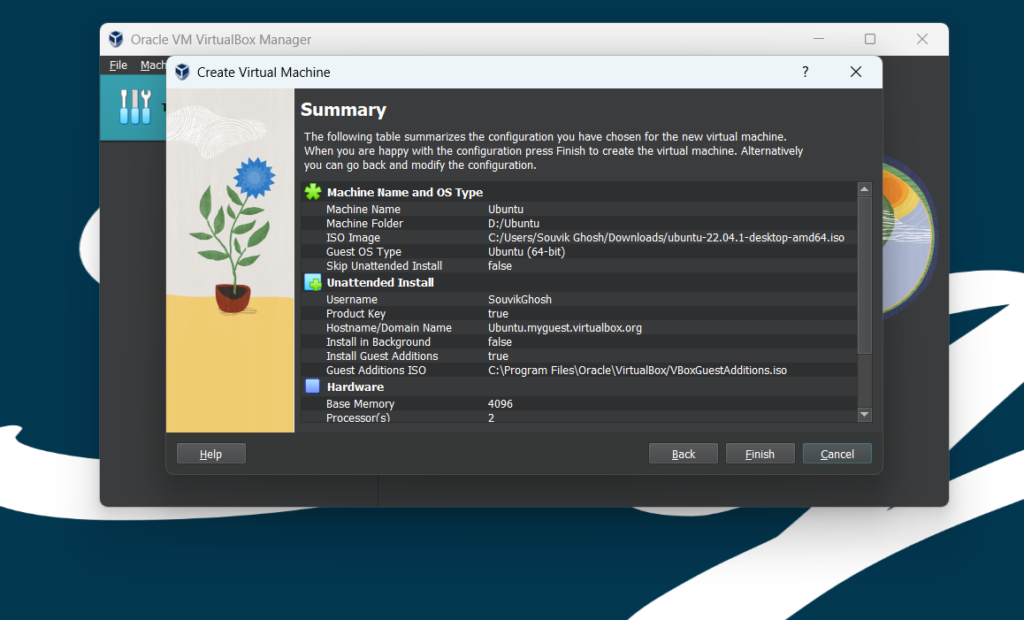
After this click Finish to initialize the machine!
3. Install your image
Click Start to launch the virtual machine.
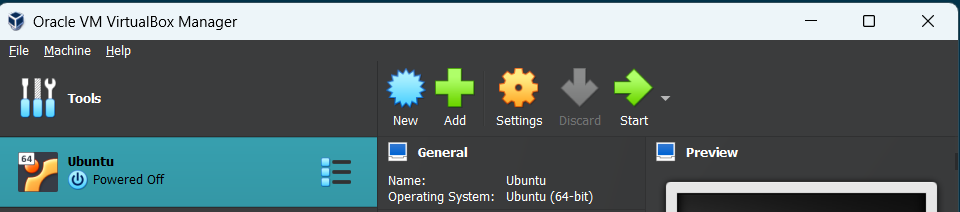
You will see a message saying ‘Powering VM up …’ and your desktop window will appear.
On the first boot, the unattended installation will kick in so do not interact with the prompt to ‘Try and Install Ubuntu’ and let it progress automatically to the splash screen and into the installer.
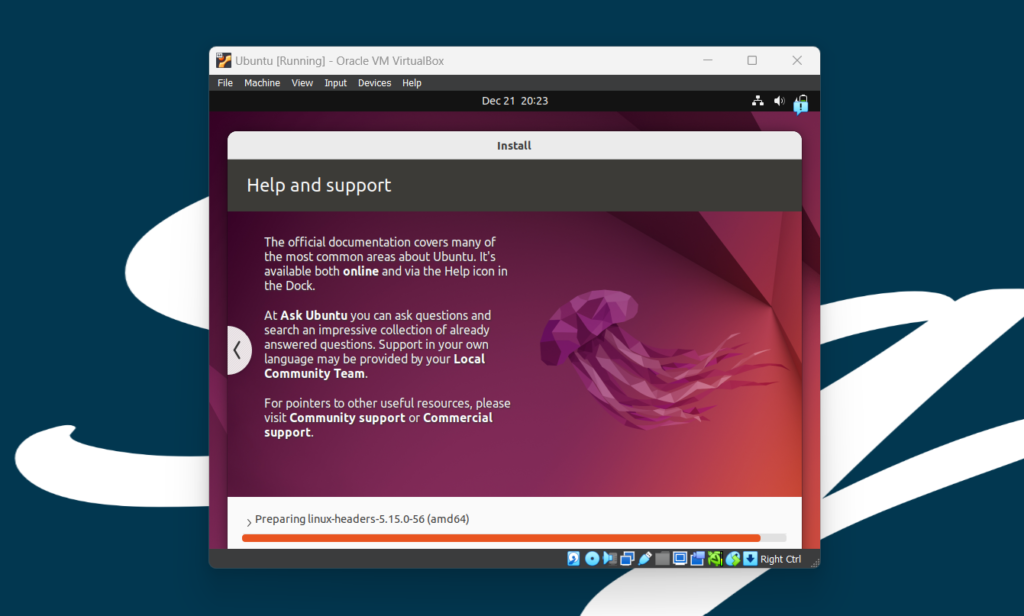
Once the installation completes, the machine will automatically reboot to complete the installation.

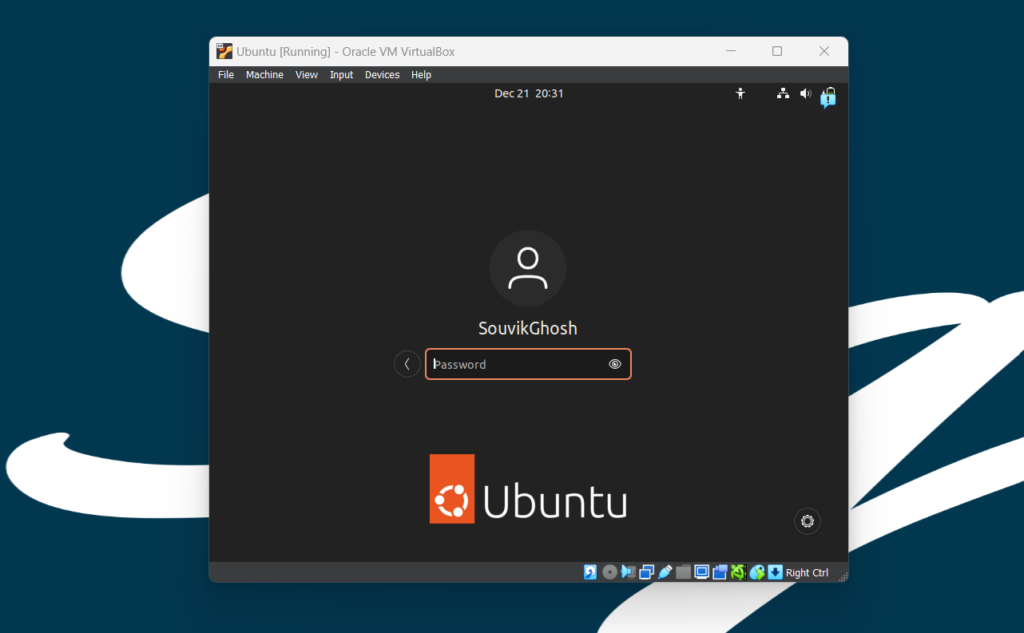
Finally, you will be greeted with the Ubuntu log-in screen where you can enter your username and password defined during the initial setup (don’t forget that the default password is ‘changeme’ if you left everything as the default).